Our Film - Vengeance

Thursday, 3 April 2014

Evaluation Question 7

Looking back at your preliminary task, what do you feel you have learnt in the progression from it to the full product?


An important aspect of the preliminary task for me was, as I was new to Media Studies at the beginning of this year, familiarising myself with the camera and the key theory behind film making. During this process, I learned how to manipulate the tripod and remove the camera from it as well as the importance of continuity when producing a film so as not to confuse the audience.


The first thing we did when preparing for the film opening task was film an accident as part of our preliminary. In this, we learned the 180 degree rule by breaking it.

Prelim accident | Breaking the 180 degree rule | image tagged in gifs | made w/ Imgflip video-to-gif makerWhen one of the boys (Harry) says "What are you doing?", we go to the other side of the pair's bodies, which is confusing as it gives the impression that they have switched sides completely, which can be disorientating for the audience.

From this, we also learnt to use the establishing shot to give the audience an idea of where the characters are.


The next important part of our process was the preliminary activity of someone walking into a room and exchanging a few words with someone else in there. We learnt two important things from this:

Match on action | Match-on-action | image tagged in gifs | made w/ Imgflip video-to-gif maker
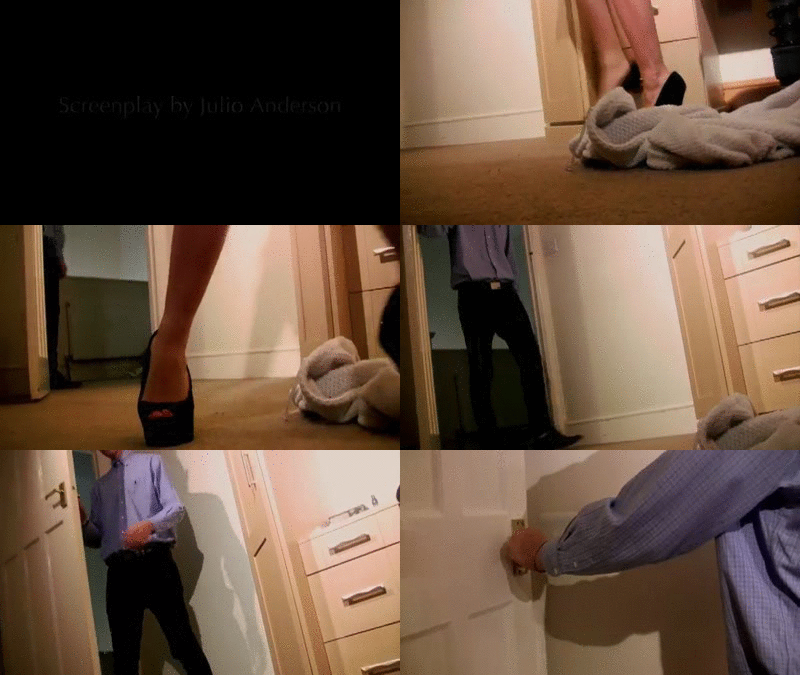
  • Match-on-action. This can be seen when the agent (Kayvon) opens the door
  • The 30 degree rule. Again, we learned this one by breaking it. Initially, when we had filmed this, we filmed two very similar shots, which we had to split up with a shot of the evil woman (me) in the editing process
30 degree rule | Solving our 30 degree rule problem | image tagged in gifs | made w/ Imgflip video-to-gif maker

The preliminary task was a simple, practical method of learning the key theory which would later dictate the success of the finished film opening.

It was particularly vital as Media Studies is a largely practical subject which consequently means that the best way to find out about it is to experience it yourself. The 180 degree rule in particular was confusing until we were given the opportunity to try it out for ourselves and make mistakes,

We then used these processes during the production of our film opening.

matchonaction | Match-on-action | image tagged in gifs | made w/ Imgflip video-to-gif makerkeeping180degree | Keeping to the 180 degree rule | image tagged in gifs | made w/ Imgflip video-to-gif maker

We made sure we did not break the 180 degree rule by showing movement in the shots whenever we needed to break it.

Another important aspect was dressing the set. Without an idea of how to dress the set, it would have been difficult to create both the desired sultry effect for our film opening as well as making the location/set realistic. This can be seen in my preliinary acivity. It was about a James Bond-like spy breaking into a villain's secret hideout, but the setting was so unrealistic that it was comican and therefore we were forced to make the preliminary more comical in order for it to be entertaining for the audience.

In contrast, during the filming for the Film Opening Task, we payed special attention to the dressing table, making sure that there was not any large empty spaces or overly cluttered areas on the table to give the audience that this is an authentic dressing table to make the characters and what they are doing in the opening seem more authentic, enabling the audience to better suspend their disbelief. As well as this, we made sure that the majority of the perfume bottles we used were red in order to adhere to our colour choices nd give the impression of bloodm forshadowing what happens later in the film.

The storyboard is also a bis aspect of my personal learning curve from this Film Opening experience. Idiscovered that it is usefu when ordering thoughts to have a sotryboard and that it speeds up the shoot as we had a clear and mutual idea in our heads as to what it was we were going to try to achieve. We were also able to eliminate the majority of the continuity errors earlier on and go back to modify if we founda mistake. However,  I slao discovered that we should not simply feel as though we were confined to what we had pre-planned in the storyboard and instead be open for new suggestions as things may change when we finallyreach the location.

Evaluation: Question 1:

In what ways does your media product use, develop or challenge forms and conventions of real media products?
We had to work within our genre for our film opening, which is Revenge drama/Thriller; within this, there are conventions and forms, such as:
  • Narrative structure,
  • Titles,
  • Style and
  • Characters.
Firstly, within our genre, the narrative structure can differ from theorists such as Todorov's, whose theory is shown below:
Instead, we wanted to start within the disruption/journey, which is common is many revenge drama/thriller movies, such as Haywire, SALT, Revenge, and Kill Bill. This is our narrative structure:


Being within the Thriller genre, we wanted our audience to be slightly apprehensive in our film opening, and wanted to subtly suggest that we have not started at an equilibrium, but a disruption, by things like:


Our protagonist looking at a happy photo,  then hiding it away and closing the drawer aggressively. This was chosen as it should intrigue the audience, and make them apprehensive as to what is going on.


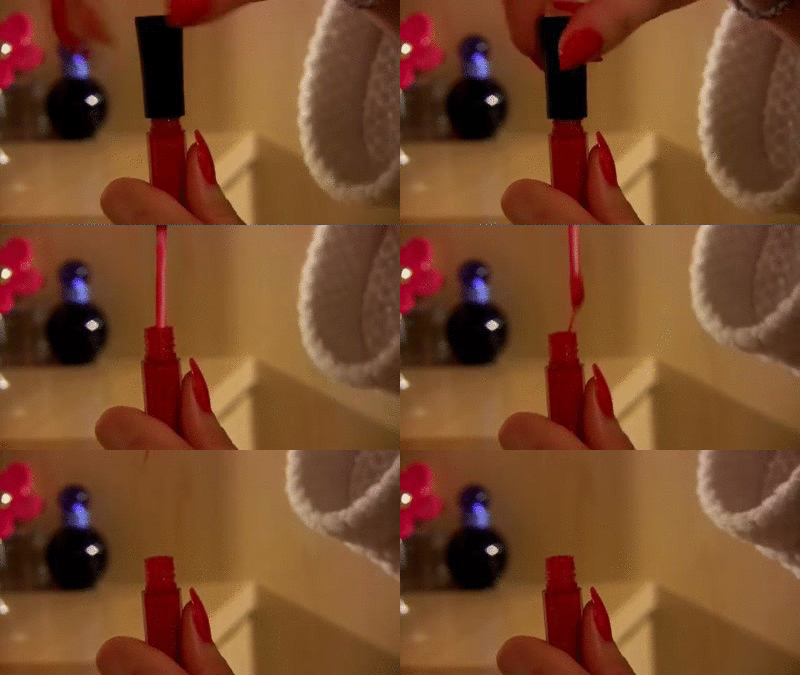
Here, the imagery of the lipstick is similar to that of blood, and was designed to make that imagery come into the minds of the audience. Again, suggesting disruption.
Here, our the shot shows our protagonist smiling in the mirror, however as the camera pans across to her face, she is staring at herself in a sinister way.  
 Our protagonist puts on her ring, - the very fact that she does not wear her engagement ring all the time should make the audience suspect that she is not honest, or in a loving relationship. She then clenches her fist, again showing the audience this undertone of aggression.

Lastly, our protagonist hears her fiance talk of his father, and how everything has to be 'perfect' with him. She then snaps out of her loving manner, and hugs him, concealing her face from him. The audience can see her sinister and suggestive expression, and she says "Oh it will be." The audience, by this point (the end of our film opening) should now be putting everything together (including the title 'Vengeance' suggesting that our protagonist is out for revenge), suspecting that she is perhaps trying to get to her fiance's father, and is concealing her true identity/intentions.

The titles within our genre, are usually slow moving, and use colours like black or white. We took particular inspiration from the title sequence in Kill Bill, however, developed this, so that the titles came between our shots, which allowed for time to pass between shots, and also gave us a darker and atmospheric feel and a slower pace.
                                                              Kill Bill's title sequence:                                                                 

Our title sequence:

Within out genre of Revenge drama/Thriller, the style is usually:
  • Dark and sultry, like in Revenge.
We created this with lighting- which was quite dark and atmospheric, although we had to have a certain degree of brightness, in order to dispel any grainy quality in our film, which we did not want and was not a convention of our genre.
We also used shots like her taking off her dressing gown, and her fiance doing up her dress, to add a sultry ambiance:
                                                                         
This sultry atmosphere was also created through our choice of music: 
 It has a very slow and sultry feel to it, along with suitable lyrics. There are also sudden beats, which go well with our moments of aggression.

  • Style within our genre is also Mysterious, like in Revenge, Haywire, Kill Bill and SALT. This also is effected by lighting, i.e. the use of dark lighting. However, it is also to do with not fully revealing (the identity of) our character:

We used lots of close-ups to not reveal 'the whole picture' keeping our audience intrigued and 'in the dark'. For example: Our opening shot is from a very low angle, and the camera tilted upwards; our protagonists face is largely concealed.
We also chose this shot to open out film, as it establishes our character as a powerful 'femme fatale' character. This is very common in Revenge drama/Thrillers, although a female protagonist is less common within this genre; however, when there is a female, they are usually 'femme fatale' characters. A 'femme fatale' character is usually:
  •  Mysterious, 
We depicted this by using lots of close-ups and disorientating/concealing shots, here are a few examples of these:
Many of our references also used shots in a similar way:

  • Seductive - and uses her sexual allure and charm to achieve her hidden goals
We depicted this through our protagonist:

- Putting on make up and perfume, like a concealing mask of beauty to seduce,

- Wearing high heels and a little black dress - seductive clothing,

- Practising her 'fake smile' in the mirror, and indicating that it is insincere, by the quick change, as the camera pans across, to reveal her sinister facial expression,

- Being at one moment, with the boyfriend, very tactile and smiling, then once her face is concealed (during the hug) appearing genuinely sinister and cold.


'Femme fatale' characters can often be depicted as entirely detached and heartless, and we wanted to challenge this:
Our character, Rose, does fall genuinely in love with her fiance - however, in a selfless act, she painfully chooses to give him up to save her sister. This is similar to the character of Emily Thorne from Revenge who gives up many loved ones and opportunities to stay true to her path.

We have stuck to the convention of Hero vs Villain, by portraying the father and head of the human trafficking ring as very unsympathetic with few redeeming qualities.

Wednesday, 2 April 2014

Evaluation: Question 2:

How does your media product represent particular social groups?

Our film focuses on the presentation of gender.

Evaluation: Question 3:

What kind of media institution might distribute your media product and why?

We chose Lionsgate Films to distribute our film, as we thought they would be the type of media institution to do so. 
Firstly, Lionsgate Films have produced and marketed various films of similar themes and genres; including self-development, exploitation and violence. For example films such as Abduction and The Hunger Games.
Lionsgate Films also focus on the production and distribution of foreign films, and ours will be filmed in Britain with a British cast and accents ect. 
Lionsgate are a US based company, and so are most experienced in the US. This would benefit out media product, as America  is where a lot of our core audience would lie, as themes and genres of violence and thrillers are very popular in US.
Lionsgate Films is vertically and horizontally integrated, and have experience and expertise in production,distribution, marketing and exhibition/exchange.
We want to appeal to a global market in order to optimize our chances to gain a profit from this film and to maximize our potential audience - as it is a film that, although UK based, is internationally relatable, and this company would be particularly useful as it has subsidiary companies in:
North America,
•The UK,
•Australia,
•New Zealand,
•France, and
•Scandinavia.  

We would be able to have our film released on several platforms, in accordance with our aim.

  • Cinema
  • DVD and Blu-Ray
  • Online streaming, e.g. Netflix, Love Film
  • TV releases on mainstream channels, like ITV, BBC, E4
In addition, Lionsgate are member of the Industry Trust for IP Awareness and have other affiliations with Anti-Piracy companies too. This is desirable as we would not want our film to be available illegally, and so Lionsgate can take measures to protect it.


Tuesday, 1 April 2014

Evaluation: Question 4: & Question 5:

Who would be the audience for your media product?
How did you attract/address your audience?

Evaluation: Question 6:


What have you learnt about technologies from the process of constructing this product? 
 We  had had practice with a lot of our technology during out AS media course.

Hardware:
We used a Canon HV30 to film our film opening:
Advantages:
  • Light and portable - allows a variety of different shots, including handheld, and a variety of angles and positions. This aspect was especially useful in shots like these:


For this shot, the person filming had to be on the floor, and manually tilt the camera upwards; the camera being light and portable was essential.


 For this shot, easy portability was also crucial, as the movement was tricky, and from a very low angle - again, the camera was very close to the ground - actually mounted upon a few large books.


At one point during our first shoot, the person filming (Enya) even had to sit inside the wardrobe, as we miscalculated the dimensions of our set.
This light and portable aspect also helped in the transportation process to the set, especially with large and heavy lighting kits.


  • Simple and easy to understand: we had tutorials and lots of practice with the camera, and so did not have a problem using it on set, which saved us a lot of time.
  • The footage produced was in High Definition - the LCD screen allowed for a good standard of resolution; especially useful in shots like when we film a perfume spray and lip gloss dripping, where fine detail is essential.
  • The fact we could watch back all of our footage there and then on Viewfinder also allowed us to evaluate each of our shots, and change things like the framing, acting or set accordingly. 
  • Little things like the Viewfinder screen swiveling around made it easy for the actors to see the framing, allowing them to act accordingly.
  • The shotgun mic and headphones allowed background noise to be minimal,which was particularly useful as we were filming in a house where people were around downstairs and making noise. The headphones allowed us to listen and listen back to the sound, ensuring that we captured footage with our desired quality of sound.
  • Not only was there auto focus, which allowed our shots to be focus and clear - what we visually desired, but there was also the option of manual focusing, which we used a lot. Particularly in these shots, where focus on one particular object was crucial: 
Here, we used manual focus, as there is a lot of objects in the framing, like the actors hair, and the objects on the dressing table. We had difficulty using auto focus to get sole, detailed focus on the picture, and so achieved this using auto focus. Focus on the picture here was crucial as the audience should be intrigued by the photo and the two girls in it, perhaps even recognizing out protagonist; this was necessary as it allowed our audience to piece together the story line .i.e. our whole story line follows our protagonist                                                                             tracking down her beloved sister to save her. 
 In this shot, getting the detail of the lip gloss dripping out was essential as it was the whole point of our shot: we wanted such detail that it was almost gruesome (with the connotations of blood) - setting our dark undertone in the atmosphere. As you can see, there were other objects in the shot, however with many attempts at manual focus, we finally got the detail focus solely on the lip gloss.

Once the dressing gown falls to the ground, we used manual focus to focus in on the detail of the dressing gown. We really liked this effect, in fact coming across it by accident on our test shoot, and enhanced the idea/effect during our following shoots.
 The tripod we were given was also very useful, and allowed simplistic, steady shots. For example, the first shot was done on a tripod, and is smooth and steady, however the second shot was not, and is not smooth or steady:
First shot: smooth and steady
Second shot: unstable
               
It was easy to adjust, and we had experience and a tutorial on adjusting the tripod. We used the tripod for the majority of our shots, to get a steady shot, and were still able to adjust it to get shots at angles. For instance, some of our shots were at a high angle, and we simply adjusted the tripod to allow us to alter the positioning:
The camera positioning we 
used for this shot on our first shoot:
Our shot - over-the-shoulder, low angle shot: 
         
  • The tripod and the cameras adaptability made it easy to get shots like the one below, where we had to put the camera at an angle, on the dressing table; with a bulkier camera, this may not have been possible, and without the tripod, we would have gotten a shakier shot, which we did not want.


Disadvantages to the Canon HV30 (and tripod):
  • However, in the shot above, whilst the camera and tripod were positioned on the dressing table, when the drawer slammed shot, you are able to see that the camera and tripod shook. We did not necessarily mind this effect too much, as the film dissolve to the title made it less noticeable. This was a compromise we were happy with, rather than a handheld shot, where the impact of the slamming of the drawer might not have effected it, but it would be less stable.
  • On the Viewfinder screen, footage appeared much brighter than it appeared on our computer; this caused us, on our test and first shoot, to make the lighting very dark, when in actual fact, on the computer screen, the shots looked dark enough.
  • The quality of our footage was not ideal; the resolution particularly effected our film opening as we wanted to use dark lighting to create our sultry and mysterious atmosphere. However, we could not achieve this exactly as desired, as the footage appeared grainy if there wasn't enough light in the frame. We did not want grainy footage, as it would take away from our professional look and did not suit our film. We learnt that we had to have the right amount of light for our footage to be clear, and so on each shoot adjusted the lighting until our footage was clear:


We also used three 350 watt Gulliver lights to light our film opening:
We had difficulty with our lighting from the start. We wanted dark, mood lighting; creating a tone of mystery and a sultry ambiance. However, we had little to no experience as a group with lighting to create an ambitious ambiance. We were given a tutorial on how to light; using one light as a 'spot' light, to focus on the protagonist in our case, and another as a 'filler', to fill in all of the areas that were not lit. The third light could be used behind a person to give them definition and a slight glow, and we could adjust these with the dimmers accordingly.However, we had several initial difficulties:

We had a second tutorial for the lighting with our technician. He taught us a lot about lighting which helped us improve our footage:
  • We must light from one direction, and try to keep all the light coming from this direction only as that will help with continuity between shots;
  • We must light from very high up, which gave our shots a more naturally lit look, as it could be lights from the ceiling.
  • We must use a lot of light, and we can always make our footage slightly darker with our grading in our after effects.
This tutorial was done in a room set up like our set, with a mirror and desk etc. and we were able to do lighting set ups for different shots ourselves. This really helped us to understand how to light our set with mood lighting, but also enough clarity for the camera to capture in our footage.

Software:
For our titles. we used LiveType and Premier Pro. We learnt how to use this during our media year, and experimented with creating a graded look on our final title, to fit in with our dark and mysterious atmosphere:

To communicate efficiently as a group, we used methods, like
  • Facebook - to create a group chat and have discussions whenever we needed to, as school time is limited.
  • Google Drive - we used this as a way of creating a document that we could all edit at the same time, and that was available to all of our group on the internet. This was extremely useful and helped us in many of our presentations.
  • We also used text messages and Whatsapp to communicate outside of school.


For editing our sequence together, we used Abode Premier Pro, and learnt how to effectively edit shots together, make them all continuous, for instance:
Continuity shot 1
We had to go through each shot, frame by frame, and find a point where the frames matched i.e. the action, although from a different angle, looks like it is in the same position as in the previous shot.


continuity shot 2


We also put a 'film dissolve' in for our transitions. 
We also used how to use the 'razor' tool a section of a shot to make it slow motion:


  For grading, we used Abode Premier Pro and learnt how to grade the shots so that they suited our desired mood. I learnt how to use the 'Procamp tool' which allowed you to edit the brightness, contrast, and other visual aspects of the shot. I found a general setting that would suit all of the shots, and copied and pasted the setting onto all of our shots, to keep a continuous look. I then went through and edited shots specifically, for instance lightening shots that were darker than the rest, or making certain colors come out, using the 'three way color corrector' tool . For instance, in shots where there were red and other vibrant colors, I brought out the colours using the three way color corrector. Here is a short example:

Monday, 31 March 2014

Evaluation: Question 7:

Looking back at your preliminary task, what do you feel you have learnt in progression from it to the full product?

Our preliminary task was to create a short piece of footage that focused on continuity. In this footage, a character must open a door, walk across the room, sit down opposite another character, and exchange a few lines.


When planning, we initially spent a lot of time trying to achieve difficult/impossible things, like jumping down from an open tile in the ceiling. This time, I took into account what was achievable and what was not, although our lighting was very ambitious.

During filming, we learnt about the 180 degree rule:
You cannot pass the line of action, as then everything is on the opposite side, which disorientates the audience. We used this in our preliminary task and our film opening:


In each different position, the camera changes points on the 180 degree line of action, and does not swap over and face the opposite directions or angles.


We also learnt how to effectively film and edit match-on-action. I learnt that you had to film from each different position the whole course of action, so that when you come to editing them together, you have a range of choices on where to cut the frame, to enable the action to look as natural as possible:


Friday, 28 March 2014

Evaluation question 5:

Q5: How did you attract/ address your audience?

Evaluation question 7:

 Q7: Looking back at your preliminary task, what do you feel you have learnt in progression from it to the full product?

Our Preliminary task:


The Briefs


The preliminary brief was to create a:
Continuity task involving filming and editing a character opening a door, crossing a room and sitting down in a chair opposite another character, with whom she/he then exchanges a couple of lines of dialogue. This task should demonstrate match on action, shot/reverse shot and the 180° rule.
 
Our Opening sequence brief was to create:
The titles and opening of a new fiction film, to last a maximum of two minutes. All videos and audio material must be original, produced by the candidate(s), with the exception of music or audio effects from a copyright-free source.
The different briefs we were given meant our approach to the opening sequence was a lot different. The detail of the opening sequence in comparison to the preliminary task, meant we had to pre-plan the opening sequence creating shoot boards, shot list, lighting, location and camera framing.
 

Overall Production

 Doing the preliminary activity put us in the right direction of what to plan.
There are certain aspects of the production of our preliminary task that suggest a lack of planning and consideration, such as :

-The sound of the flute in the background

-Reflection of camera in mirror.

 
The way in which we progressed these aspects is by our sense of organisation.
For our opening sequence, we planned carefully what would occur in each shot by creating shoot boards and shortlists.
After our test shoots, we would plan in  very fine detail what we needed to change and how we would go about it, in order for our shoots to run as smoothly as possible and all our time to be managed productively.
This included:
-Lighting changes
-Script changes
-Shot changes
seRfzH on Make A Gif, Animated Gifs 


Looking at our shoot board you can see the alterations we made after the test shoot, under the original plan for each shot.
This eradicated any ‘mistakes’ happening again, and allowed each test shoot to develop in a way that only involved getting better. It made no room for background noise or camera’s in shot, because when it did happen in one shoot we made sure it didn't happen in the others. 
The planning we had to go into to do the opening sequence was due to the nature of the opening sequence. The preliminary task was more about experimenting with technique rather than style as a whole. This led our opening sequence to be a lot more atmospheric, style not even being something we considered for the preliminary task.  


Creating atmosphere


When comparing both videos, another thing that differentiates them from one another is the style.
Our Preliminary task focuses on continuity, and after exploring and learning about continuity such as match on action shots and master shots that it contains, it provided us with the foundation of how to create a continuous video. This then enabled us to focus more on the style of presentation.
Our main edit has a ambiance which we have created through:
  • The mood lighting
  • Iconography; red items such as the nail varnish and lipstick.

  • Colouring, which we created through grading our shots, focusing mainly on contrast and colours such as red.


  • Actions of getting ready, slow motion of application of lipstick, blusher,  the zip of her dress.
    zip on Make A Gif
     
    • Slow pace, enhanced by the soundtrack

    • Mystery within the dialogue, a sense of double meaning it what she says within the final shot." Oh it will be" What exactly does she mean? Why is this finishing line emphasised in such a manner? The audience will find out these answers when they watch the rest of the film.
     
    Final line of dialogue on Make A Gif


    Using Technology

    After comparing both the preliminary task and our main edit of Vengeance, it is clear that the main thing that stands out is the difference in quality of filming.

    In our preliminary task the camera begins very shaky, and continues to be shaky throughout certain shots.
     
    Shaky Camera movement on Make A Gif
    However although it may not seem as evident, this was also a problem in our film opening. You can see the progress of certain shots from our test shoot to our main edit, as we experimented with different ways of making the movement shots more smooth by making them less shaky.
    Our final edit compared to our preliminary task, test shoot and second shoot, displays our progression with the use of the camera, and therefore the presentation of our shots.


    Incorporating theories-180 and 30° rule. 

    The preliminary task’s main focus was on presenting a piece that displayed continuity. Therefore it gave us a chance to explore the following:
    -180 and 30 degree rule.
    -Shot reverse shot
    -Match on action
    This meant we then had the knowledge to incorporate these rules and techniques into our opening sequence. 

    What we learnt from the preliminary:
    • Match on Action
    • Continuity
    • 180 and 30 degree rule 

     
    z0EhVn on Make A Gif, Animated Gifs

     
    Incorporating it into our Opening sequence:


    Match on Action:


    Match on action on Make A Gif


    Continuity:

    continutity 2 on Make A Gif

     
    brush on Make A Gif
     

    180 and 30 degree rule:

    h on Make A Gif


    If I could do this project again I would:

    • Have made sure to know how to use the lights properly, prior to doing our test shoot, so we could have focused on other parts of the opening sequence like movement camera shots instead of trying to work out the lighting
    This would have allowed more time overall for us to shoot, meaning more time to perfect the shots instead of just trying to get them all done.

    The project as a whole taught me about the foundation of putting a film/ opening sequence together and all the aspects necessary to consider. Not only did I learn the theoretical rules, but the practicality of putting all planning into practice made me more aware of all the things that need to be considered .